
 By Bob Brendle/photos by the author
As I have added to the structures and rolling stock for my HOn3 Westcliff & Alton Railway Company, I find I’m using more and more styrene as a material of choice for kits and scratchbuilding. However, the prevalent prototype material I seem to model is wood. The character of the Westcliff & Alton I am trying to create, that of very well used and aged equipment and structures, is not the normal state of styrene as a material. With that in mind, I began to explore techniques to transform styrene into a reasonable representation of the material often associated with narrow gauge steam railroading, aged and weathered wood.
Why styrene? Several reasons. Styrene is easy to fabricate, that is, cut, shape, and bond. Parts assemble quickly. There are shapes and sheet stock to fit almost any need. The material is stable, doesn’t warp or shrink. It can depict other materials; steel, brick, concrete, and the subject of this article, wood. There are an abundance of styrene window and door castings, sich as Grandt Line parts. There is also a wide variety of kits, often inexpensive, representing both structures and rolling stock available to the modeler.
It is reasonably easy to depict a newly shopped and painted piece of rolling stock. But, what we want to do is take the material and represent what happens to the wood after a few years of exposure in the high country. My first step in the evolution of this process was a bit of weathering applied to this styrene IHC Old Time series water car. I purchased the car feeling it was unique bit of rolling stock and would fit nicely with the era and feel of the Westcliff & Alton. I also liked the pre-painted kit’s color, a slightly faded green, but it was just a bit too pristine. While studying the kit and thinking of ways to age it, I noticed that there was already a nice wood grain texture molded into the boards, but the texture was difficult to see. Thinking dry-brushing would bring out the texture.
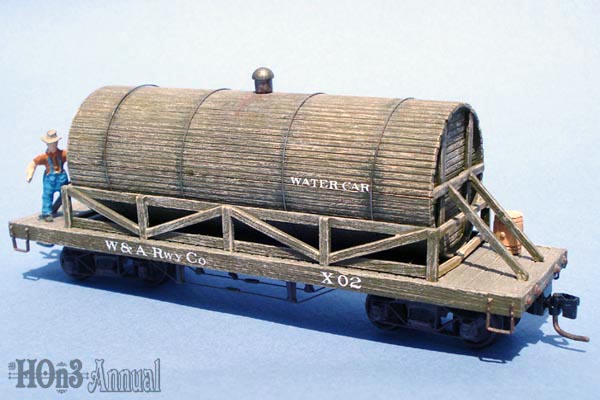 Photo 2: IHC “Old Time” Series Tank Car, weathered and aged by the author
I looked through my paint box and found that a light flesh color I was using for painting figures, actually also looked like a raw wood. I began dry brushing and voila, the wood grain began to pop. I notched a few of the too-perfect boards at the end of the wood tank, added some bands, and had a very decent model that had been aged really quite easily and quickly.
This leads us to the two phases of the aging and weathering process: Phase 1, creating the wood grain texture, and Phase 2, painting to highlight and emphasize this texture.
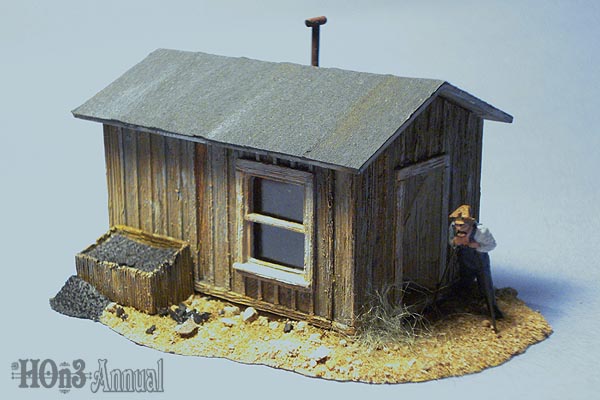
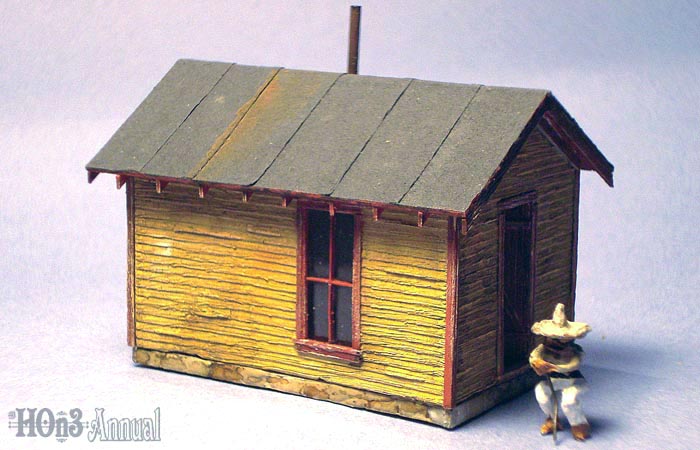
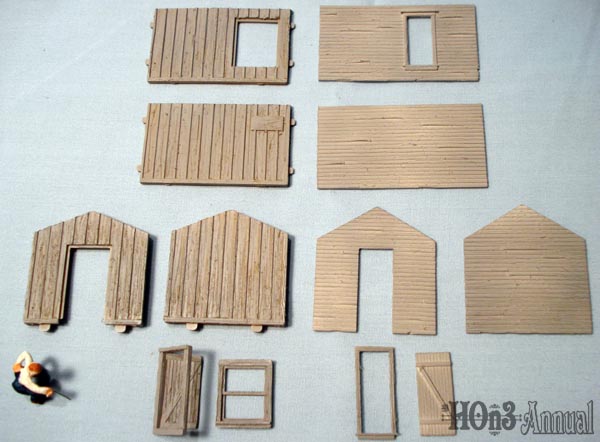
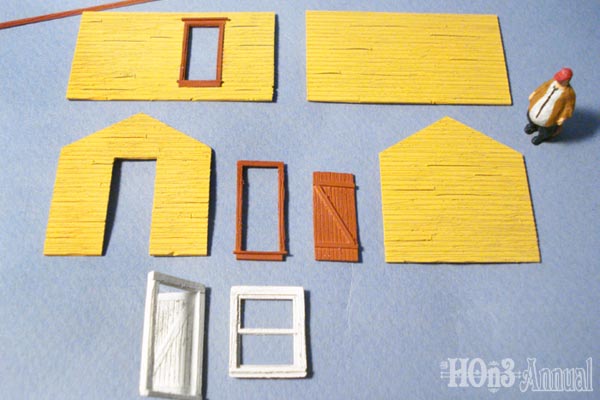
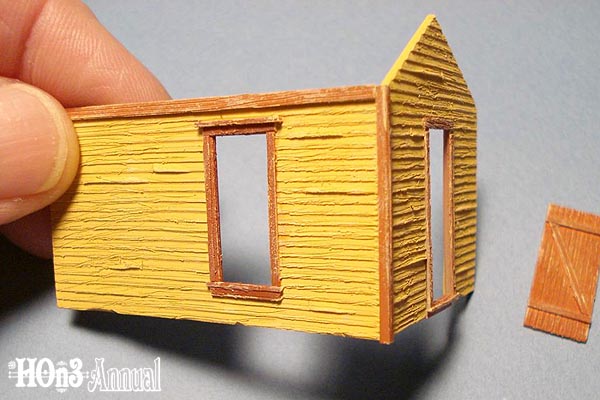
To demonstrate, we will use the techniques on a kit, an Atlas Trackside Shanty (above), and to demonstrate the technique on styrene stock, a similar scratchbuilt shack. Finishing or painting the two shacks also demonstrates creating an un-painted wood finish and a weathered painted wood.
Creating Wood Texture
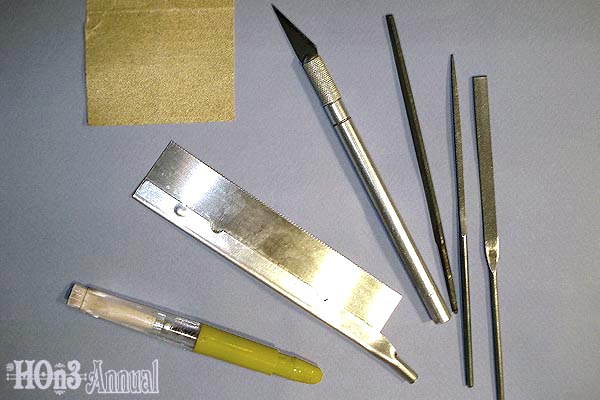
You probably already have the necessary tools (above). For adding texture, you need a razor saw and a fiberglass/metal eraser. After a bit of discomfort, I would recommend using a metal bristle version such as the “Distresser” from MicroMark. The fiberglass bristles tend to break off and get into your fingertips. A bit of sand paper is used to clean up some of the fuzz created while adding the texture, and some files for shaping. A #11 hobby knife is used to shape and add texture.
I’ve learned from this process styrene is a pretty robust material, so you can be aggressive in adding the texture. On the Atlas shed wall, drag the razor saw blade down the boards always running the long direction, or the wood grain direction of the board. You can make several passes and can really bear down. It’s hard to hurt this stuff. I also take the tip of the saw blade and use it to gouge a couple of deeper grain grooves into the boards. Do the same at the edge of the battens to better define them. Also, use this technique on styrene stock. Drag the blade down the styrene. Hold the styrene board or trim stock at one end and push the blade away from you. The trim I used on the shed’s door and window framing is scale 1″ x 4″.
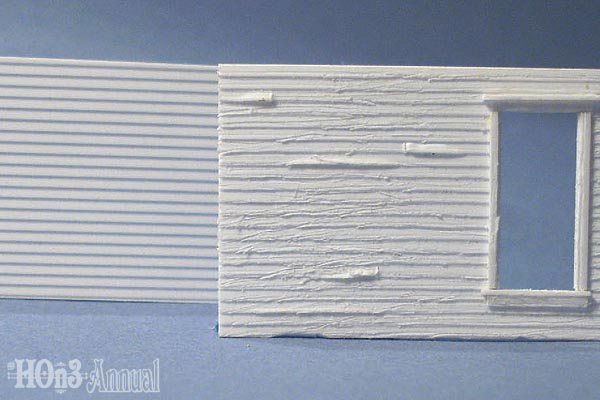
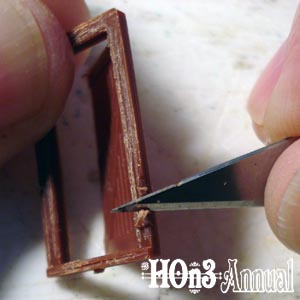
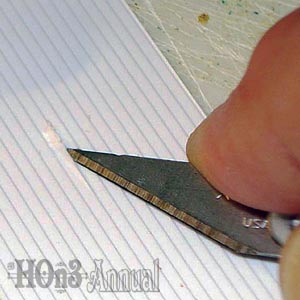 For my scratchbuilt shed, and to demonstrate other texturing techniques, I used clapboard siding (above). After you have cut your wall from the styrene sheet stock, raise a few boards to depict those that have perhaps warped and /or become un-nailed or loose. To do this, slip the #11 blade into the styrene about the depth of a board and slice along a couple of scale feet (left). The blade will raise the board. At the end of your raised board, make a vertical slice. This creates the end of the board. Repeat this on a few randomly placed locations on your wall.
To further texture the wall and represent boards that may have rotted away, take the #11 blade and scoop out about an 18″ to 2′ length of board (below). Make this just one board deep (don’t do two or lap into a second board at the same location) and scoop down to make it level with the board below it. Repeat this in several locations also.
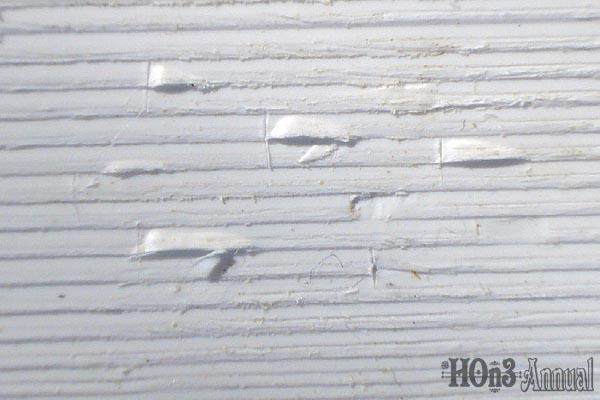
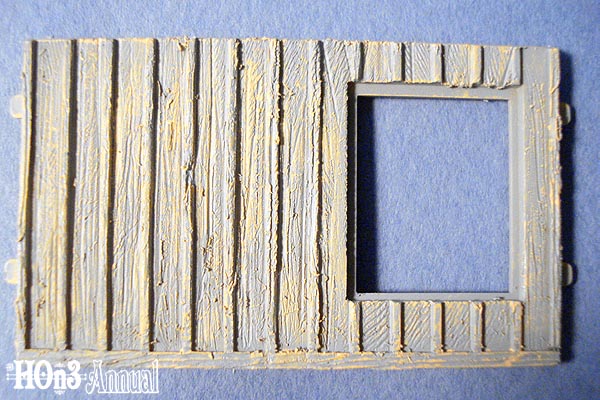
Now take the razor saw and drag it horizontally, or the direction of the boards and wood grain. Again, you can be pretty aggressive here. You can’t seem to hurt styrene. After this step, take either the fiberglass eraser or the Distresser and scrub the siding to clean off a bit of the fuzz raised by the saw treatment. This also adds a bit of finer wood grain texture to the siding (Photo 7, below).
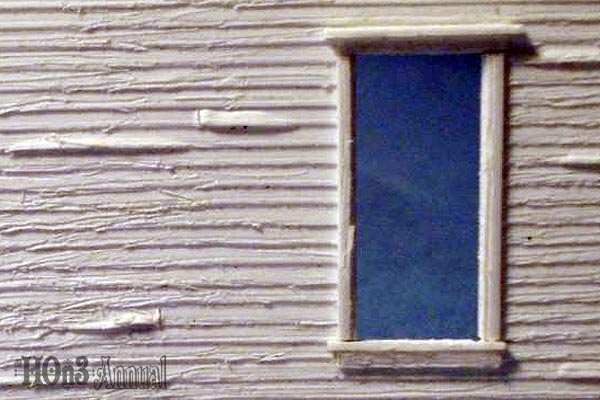
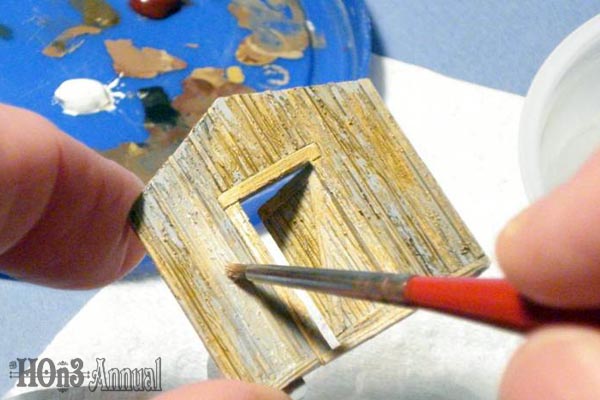
 You can apply these same steps to door and widow castings. It may take some maneuvering to get to all the areas, but try to cover as much as you can with texture either from the saw treatment or the Distressing Brush. For the smaller or really hard-to-reach areas, you can use the tip of the #11 and carve individual grain grooves. Often these styrene castings, like the siding or strip stock, are too perfect, so I use the #11 and the files to put a few dings in the frame (left), roughing up the corners a bit to simulate where a cart might have nicked the corner or, in the case of the gondola, wear from loads being dropped or dragged over the top board (below).

Paint and Weathering
I treated the Atlas trackside shed to represent unpainted wood, while the scratchbuilt version is painted. The paints are shown below. To create the raw wood highlights, I use a light flesh or peachy tan color, such as Tamiya #81315 X15 Flat Flesh. A tan or beige won’t work, it is rather dull and the weathering will kill the highlight needed.
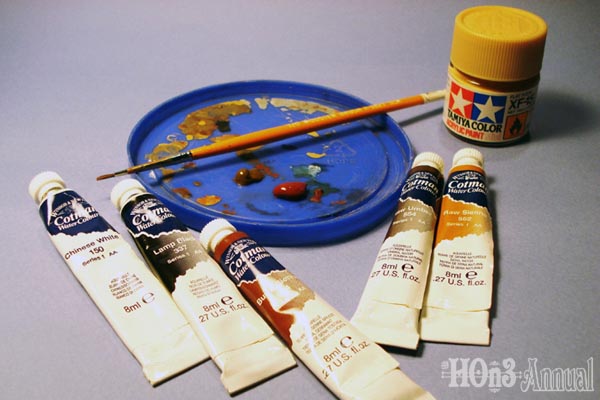
For the weathering I use rather inexpensive Cotman series watercolor from Winsor Newton. According to the Winsor Newton literature: “The range consists of 50 colors in tubes, which possess good transparency, excellent tinting strength and good working properties…” You can find these in art supply stores. The colors I use are: Chinese White #150, Lamp Black #337, Raw Umber #554, Raw Sienna #552, and Burnt Sienna #074. First though, I prime everything with Floquil Primer. With the news that Testors is dropping this line, you will have to find a substitute now. NOTE: Before you prime, always wash with water and a drop of detergent and let air dry. I use an old soft toothbrush as there may be more residue than usual to clean after the texturing process.
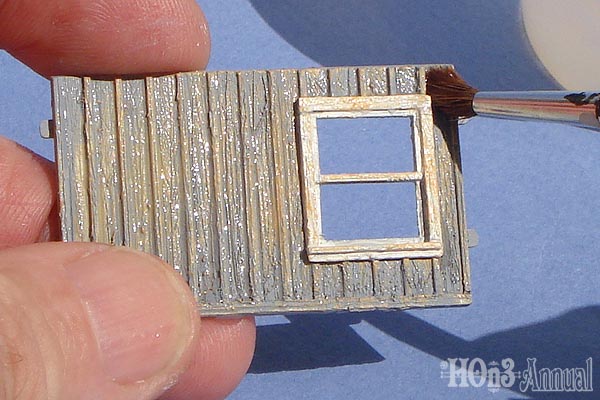
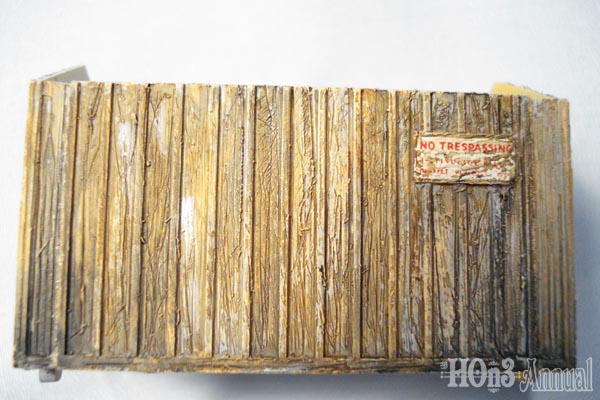
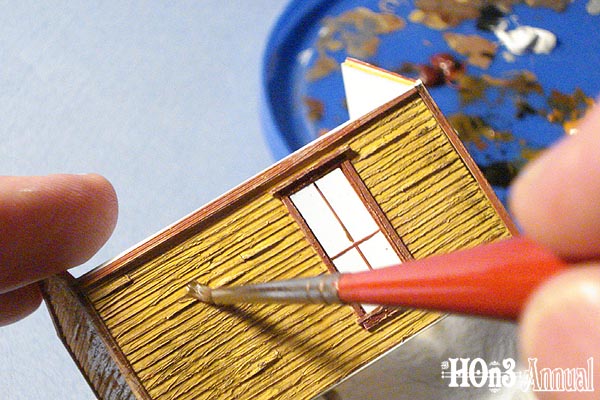
After the primer has air dried (you can’t smell it), dry brush with the light flesh color for the “un-painted” wood. You will really see the texture beginning to come out (Photo 12, below). On the Atlas shed, there was a decal, so after the dry brushing now is the time to add signs or posters. Our “un-painted wood” walls are now ready for weathering which is done with the watercolor.
Watercolor is a unique media, it doesn’t really paint or cover the surface, it is translucent, so the surface beneath shows through, acting almost as a stain, which is excellent for our purposes. Also, the watercolors will blend with each other on the wet surface, which again aids our purpose of subtly staining the wall. We in a sense are simulating nature, the water might be thought of as rain washing the soot and grime down the wall. Because, watercolor is a unique media, I recommend practicing with it to get a feel for how much color to use, how to blend, and the effects you can create. What you see while you are painting isn’t necessarily the end result. The good news is, if you don’t like it, you can wet it and make changes.
I use a plastic lid from a coffee can as a palette and squeeze just a dab of the colors onto the lid. We don’t use much paint. Now wet the surface thoroughly (above). I use a #4 watercolor brush. Add a few drops of isopropyl alcohol to the water to help break the surface tension. You will probably want to work in small, about 3″ x 3″ areas, as the wall or surface will dry.
Now wet a #1 brush and dab it lightly into the paint and apply it to the still wet wall. I usually pull a bit of the paint from the dab on the palette and mix it to a slightly thinned consistency, and then apply it to the wall (Photo 14, above). Start at the top and work your way down. Think of rain washing down a wall or across a surface. Add the colors at random and try to keep the colors fresh, in other words, don’t let them get muddy by all running together. Go very easy with the black. A little black goes a very long way, and tends to darken the wall too much, so use it sparingly.
You will notice areas beginning to develop a “nature” of their own, maybe a nice warm gold from the raw sienna, or a slightly darker area forming from the burnt umber. As these begin to evolve, I go back to them and add a bit more color, just to give that area a little boost or to enhance the color. As for the white, I will also go in and randomly place a few direct hits of white. That is a small dab of the paint placed on the tip of the brush then dabbed directly on the wall. These help break up the wall and represent salts or bleached spots on the wood.
Here is the result of our “un-painted” wood wall (above). The watercolor technique for the painted wall is the same (below). For the painted surface of the wall though, I soften the paint from the bottle, with a drop of white, which helps create a sun-faded color. For the scratchbuilt shed, I used Floquil Reefer Yellow for the walls and Zinc Chromate Primer for the trim.
The Zinc Chromate comes out of the bottle pretty much looking like a faded Box Car Red. So using the same technique, dry brush the painted walls and trim with the light flesh paint to highlight the wood texture (below).
After this dries, wet the surface with a #4 brush, and apply the watercolors. Again, black is strong so go easy with it. You can add water and thin it if you have too much as I did in on my first attempt. Always wash the paint down the wall or in the direction water would flow (Photo 18, below). If you begin to get too much water, take the edge of a paper towel and touch it to the water, and it will wick off.
That about wraps it up, using a bit of alchemy to yield aged weathered wood from styrene. Practice your technique, practice with watercolor, and take advantage of the head start styrene “wood” kits can give you for creating some very nice structures and rolling stock for your model railroad.
Order the 2013 HOn3 Annual today!