
 by Bob Bennett/photos by the author
As my article in the 2020 HOn3 Annual forecasted, I have begun construction of an HOn3 diorama that will serve to help me stay active in model railroad construction as my On30 layout nears completion. Having a lot of “free time” during the pandemic allowed me to get quite a bit of the initial work completed and in this piece, I’ll describe some of that effort, with photos to verify it. I’ll also describe the inspiration for, and work on, a business that just sort of popped up for for the town of Allison that both fits in a particular space and fulfills a basic need.
As for the diorama, I want it to be as simple as possible as far as trackwork and control goes. I always intended it to be strictly DC, using a relatively old MRC controller that I have had for a while. The trackage was to be a through “main line” with a run around track and several sidings, requiring a total of six turnouts. With a basic plan in mind, I started construction. Right off the bat, I saw that my original plan to use a 2×4 ft. frame provided by my friend Joe Cirillo wouldn’t be adequate in terms of length. So, I cobbled together a twelve-inch-long by two-foot-wide addition and screwed and glued it to one end of the framing. At some point, I plan to add a removable extension to the opposite end as well. These changes will provide enough room to maneuver a two to three car train with a loco and caboose.
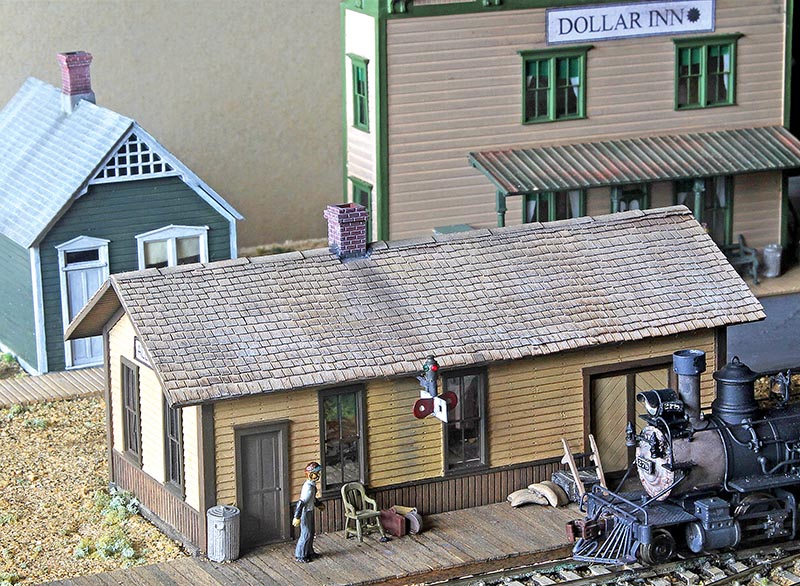
ABOVE: Here is an overall look at the diorama. At 2′ x 5′, it isn’t huge. But, the track layout does provide space for several industries. There will also be a small but bustling business district featuring many of the structures and facilities that appeared in the last HOn3 Annual. Most of the ground cover is in place. I used a mix of real sand and fine dirt with patches of ground foam of various textures. Working in small areas, I put the buildings in place, spread out the soil and grass, bringing the material right up to the base of the structures. Then, when I was happy with the appearance, I used Woodland Scenics liquid scenery cement liberally applied with an ear syringe to hold it all in place. I carefully removed the structures shortly after using the glue and for the most part, when everything was set, they fit in their places quite well. In the center of this photo, the outline of the depot and its platform are clearly shown.
Next, I created vertical support for the diorama. I had saved the corner leg openings from a long-gone HOn30/HO module and I screwed them into place in the corners of the basic frame. I had also kept the legs from that effort, and I made sure they fit in the new spaces; they provide a height of about four feet from floor to the top of the layout, which is half inch thick Homasote for the whole surface. At the addition end, I also added a fifth, centered leg I had on-hand to provide a bit more support and stability.
With basic construction done, I now focused on the track and wiring.
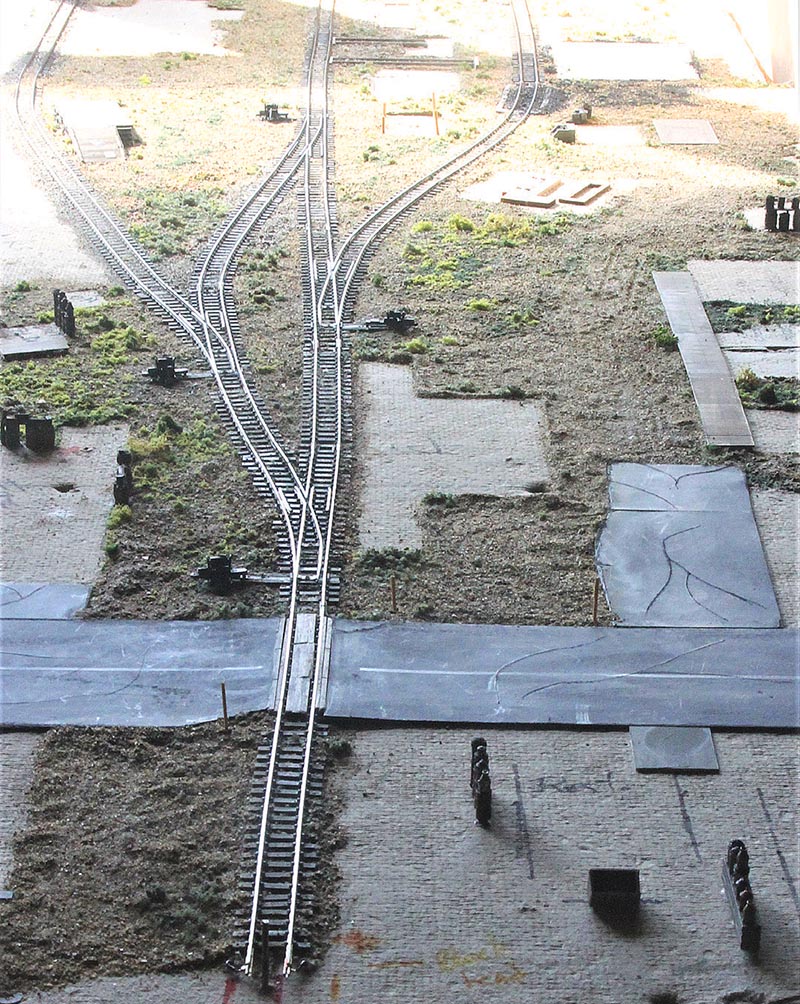
I have a fair number of turnouts saved from my previous HOn3 layout and intended to use the most “in shape” ones for this project. Many had feeders soldered in place and some were pretty distressed, but ultimately I had what I needed. The big issue came up in the track layout. Two of the sidings that I had envisioned required reversed switches. In other words, the loco enters the siding and then goes backward through another turnout to drop off a car or do whatever work is needed.
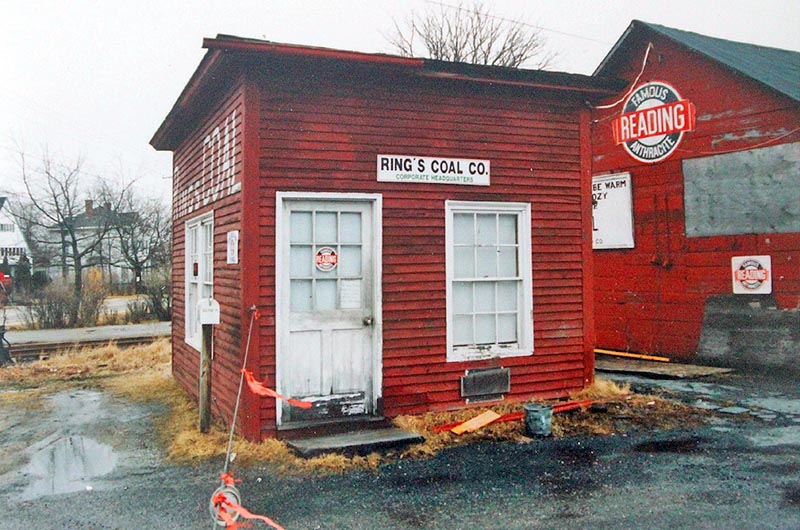
ABOVE: Let’s move on now to the business that I believed Allison could use and the inspiration for it. Ring’s Coal was a fairly sizeable fuel dealership that once sat on the standard gauge Grand Trunk Railway in Yarmouth, Maine. The coal dealer sat very close to the beautiful Yarmouth depot, which still exists; Ring’s is long gone, however. I took a number of color prints of the buildings many years ago with the intent to at some point build a model. I never took dimensions of the office structure, so the next task was to come up with those as closely as possible. Figuring a door height of about 6′-8″, plus the framing, I used that dimension to calculate a length of 16′ including trim boards and a width of 14′. The height of the front and left walls is 11′-6″ and the opposite end slopes to 7′-6″.

ABOVE: Here is a view of the front of my representation of the Ring’s Coal headquarters. I had already decided to use styrene as my material. While the real structure was sided with clapboards, I didn’t have the right sized Evergreen sheet in my diminishing stash. So, I decided to use board and batten siding instead. I cut the four walls to size and then tried to find some windows that would fit. The parts that I came up with are very old Campbell castings. While they obviously aren’t a true match to the prototypes, they fit the space and provide the needed entrance and function. The flat area to the right is weathered styrene scribed siding that simulates the scale used to weigh truck loads of coal headed out to be delivered.
Now, I will be the first to admit that my knowledge of wiring and electricity are about non-existent. So, when I started to put the flextrack and switches in place and hooked up the power supply, everything was crazy . For several months, off and on, I tried various wiring set-ups. Sometimes some sidings worked, but when I added others, things went down. At some points, even the main, through track wouldn’t have power. Finally, I was able to establish the main line, the runaround track and two sidings, both heading in the same direction.
The extra length of the benchwork gave me some flexibility and ultimately, I am satisfied with the track pattern and the features, structures and details it supports. I was able to mount an old sliding computer keyboard shelf under the framing at one end, and the MRC power pack fits nicely on it. The connection to the layout wiring from the pack is two wires clipped onto a couple of brass screws that are twisted through the side boards and which, in turn, have the wiring soldered to them on the underside; it doesn’t get much simpler than that, but it works. Now it was time to locate the structures and add ground cover and the dirt and paved roads that serve the area. Photos and captions will detail these efforts…
