 by Dale Smith/photos by the author
In the 1930s things were looking grim for the Bellevue & Cascade Railroad narrow gauge railway in Iowa. Running 36 miles from Bellevue, on the banks of the Mississippi River in the east, to Cascade, in the west of the state, pressure was mounting on the lines resources against the ever growing threat of the motor vehicle and industrialization, as well as the lines own shortcomings. The Milwaukee Road standard gauge line that routed through Bellevue was also increasing pressure on the small narrow gauge to be changed from 3-foot to 4-foot, eight-and-one-half inches, thus alleviating the need for any freight to be transloaded at Bellevue to the standard gauge for onward shipping.
There were increasing calls from the narrow gauge lines customers to convert to the Milwaukee Road standard gauge, which would allow use of the larger stock and boxcars then being used. The smaller, lighter freight rolling stock on the Bellevue & Cascade was simply not capable of hauling the larger amounts of freight and livestock due to above mentioned problem of transloading at Bellevue. Further reading and history on this line is available in a book titled Milwaukee Road Narrow Gauge, The Chicago, Bellevue, Cascade & Western: Iowa’s Slim Princess by John Tigges and Jon Jacobson.
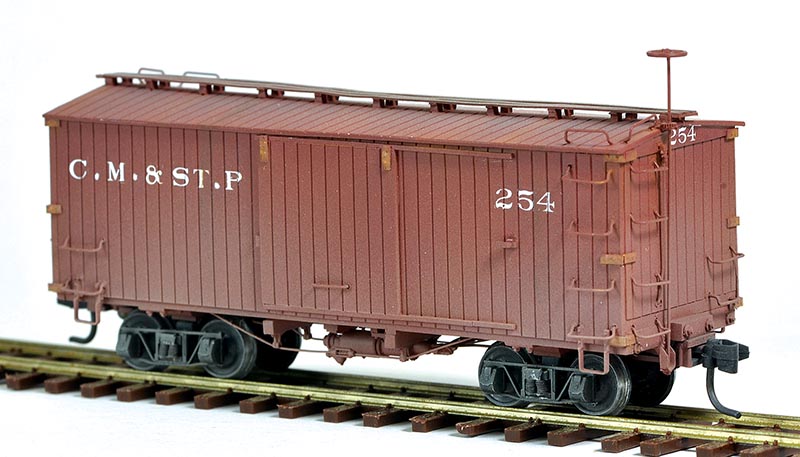
My main principal interest in narrow gauge modelling is the D&RGW in Sn3 scale but I’d recently been looking around for a small narrow gauge line to model with some HOn3 cars and locomotives that I had acquired from an estate, and some HOn3 cars from this particular line that I had purchased on the net. In the above mentioned book by Tigges and Jacobson there were plans of the Bellevue & Cascade line rolling stock and I felt I could easily scratchbuild a small 24-foot boxcar to go with the kits I had purchased, utilizing Evergreen styrene, some Grandt Line details, and Kadee trucks. The results of that effort are as follows.
Starting Off With the Underframe
Kicking things off with the car’s frame, Evergreen styrene was used (Evergreen 156 and 157). The size to use ascertained from one of the previously mentioned car kits I had purchased. Provision was made for the attachment of Kadee HOn3 No. 714 split shank couplers; these are attached with screws (which is my preferred way on most cars) in case the couplers need to be removed for maintenance or replacement at a later time. Small Kadee nut-bolt-washer (NBW) castings to represent the truss rod ends were also added (See Photo 1). The car bolsters were constructed with some Evergreen styrene and detailed further with some Grandt Line NBW items and some plastic tube.
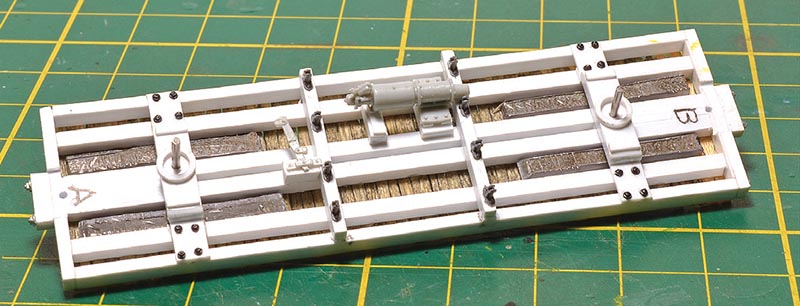
ABOVE: Narrow strips of lead were situated at each end of the car just above the wagon bolster point.
I enjoy detailing the underneath of all my HOn3 rolling stock and this one was no exception. For the brake rigging I used Grandt Line No. 5040 Westinghouse Brake Set with fine brass wire to represent the brake rodding. Thin pieces of stained strip wood were applied for the boxcar floor as I wished to model this car with one of the side doors open. Weight would be needed to have the car tracking well on the rails, so some narrow strips of lead were situated at each end of the car just above the bolster point, out of sight.
For attachment of the Kadee No. 716 trucks, the two small stainless steel pins that are supplied with the trucks were press-fitted in pre-drilled holes in the bolster. Some Grandt Line No. 5051 5″ queen posts were added, then the truss rods represented by thin nylon fishing wire were threaded through the floor with turnbuckles borrowed from a Rail Line HOn3 D&RGW 30′ boxcar kit (I must remember to replace those), and were slipped over the nylon before being glued in place with a tiny drop of ACC.
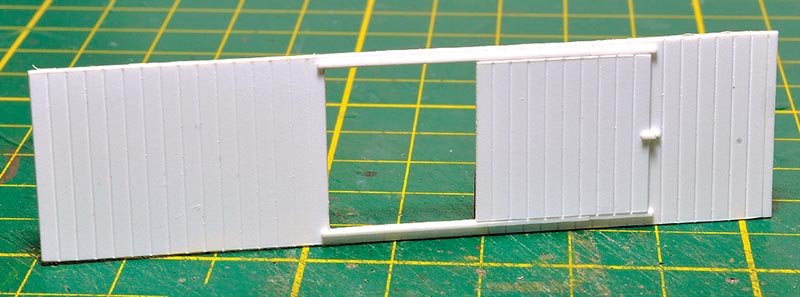
ABOVE: 2.0mm groove spacing was used for all sides and the roof as it was close to the 6″ panels of the prototype.
Car Sides, Ends and Roof
Putting the underframe aside for the glue to dry completely, construc-tion of the roof, sides and ends was begun. Evergreen No. 2080 V-groove car siding with 2.0 mm spacing was used for all sides and the roof as it was close to the 6-inch panels of the prototype. I
had decided that with this car one of the side doors was to be left open, and as you could see into the car, detailing of the opposite inner wall would be undertaken. The roof was cut to size and scored lightly once with a razor knife down the center line (do not press too hard), then gently bent to the correct angle. Thin cement was applied to the cut to get the styrene to hold the shape, and allowed to dry.
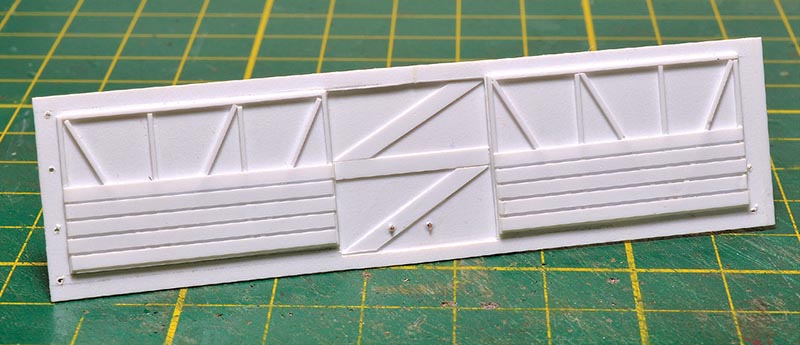
ABOVE: Detailing of the interior car side with the closed door.
It’s a good idea at this stage to fit the hand grabs to the car sides and ends as it will save unnecessary pressure being applied to the model trying to drill the holes for their placement. All the hand grabs were fitted and ACC applied on the inner wall surfaces then allowed to dry. The inner surfaces of the sides, ends and roof were sprayed Gunze Sangyo H336 Hemp for attaching to the frame…


